Showing posts with label fall favorites. Show all posts

Sunday, November 11, 2012

Pumpkin Bundt Cake with Pumpkin Cream Cheese Frosting

Tonight I tried something new for me: Pumpkin Bundt Cake- to use up some cream cheese frosting- with a little hint of pumpkin in it- cause I am a sucker for anything flavored with pumpkin and cream cheese.  Here is what I did. I hope it works for you like it did for me, it was delicious! {Note: I sort of improvised with the frosting- see details below. I also added the spices with not exact measuring- as noted below. I don't think you can mess this one up though- if you are a pumpkin lover like me :) }


Pumpkin Pie Bundt Cake:
2 cups granulated sugar
1 cup butter, softened  OR I cup unsweetened applesauce- {I used this instead of the butter}
Mix together, and add the eggs one at a time.
4 large eggs
1 cup canned pumpkin {pure pumpkin, not the kind for pumpkin pie}
Mix in, and then add sour cream.
1 cup sour cream {I used a fat free kind}
2 teaspoons vanilla extract
3 cups all-purpose flour
Add the flour one cup at a time, and then add the ingredients below.
1 tablespoon ground cinnamon
  2 tsp. pumpkin pie spice
  1 tsp. nutmeg {I used a little more}
 1 tsp. cloves {I used a little more}
2 teaspoons baking soda
1 teaspoon salt
Pour into a prepared bundt cake pan. I used PAM spray, and sprinkled it with cinnamon sugar.
Bake at 350 for one hour. Test with a toothpick- when it comes out almost clean, it is done. Allow to cool in pan for at least 25 min. Then transfer carefully to a plate. Allow to cool a little more, and add the frosting while it is still warm.

FROSTING:
4 oz. cream cheese (softened) you can use the reduced fat kind
1/2 cup butter or margarine softened
2 tsp. vanilla
4-5 cups powdered sugar
If you want it pumpkin flavored, add 2 TBSP. pumpkin. I cheated, and added some Trader Joe's pumpkin cream cheese that I had. You could probably also use Pumpkin Butter.  I think this would be really good with some orange zest in it.
 
Blend together until light and fluffy. Put on cake while it is still warm, and it will melt a little and drip down on the sides.
This frosting is really good- watch out if you have graham crackers in your house.

 
Enjoy! This was another great pumpkin dessert to add to my ever-growing pumpkin recipe list!
I hope you are enjoying your Fall Season!

post signature

Sunday, November 4, 2012

Easy Pumpkin Ice Cream & Vanilla Pie


**great give-a-way coming tomorrow-- another awesome one for Holiday Cards!**

One of my favorite things we had at Thanksgiving growing up, was Pumpkin Ice Cream Pie! I have been meaning to share it here for years, and today I'll share with you an easy way to make it with a twist. Believe me, this will impress all your friends and family- and even those that might not like pumpkin- may love this!

Pumpkin Ice Cream & Vanilla Pudding Pie {the EASY way}
1 1/2 cups graham crackers
6 TBSP melted butter
1/3 cup sugar
1 tsp. cinnamon (optional)
2-3 cups pumpkin ice cream {This is a seasonal item, you can find in almost any grocery store. I used Trader Joe's brand.}
8 oz. container Cool Whip
1 small package Instant Sugar Free Vanilla Pudding Mix

1. Melt the butter in a 9 inch glass pie pan. I melted mine in the microwave. Crush graham crackers until fine crumbs. I used a small food chopper. Add the graham crackers and sugar, and cinnamon (optional), to the butter. I mixed mine right in the glass pie pan. When well mixed, pat to the bottom and sides to form a pie crust. Chill for about one hour in the freezer.
2. Allow pumpkin ice cream to soften. Scoop out 2 or 3 cups and spread evenly on the pie crust. Allow to chill for at least 1/2 hour.
3. Mix the cool whip and pudding MIX together. Spread evenly on top of the ice cream layer. Freeze for 2-3 hours or longer before serving.

Enjoy! This is fun to add to the "pie fest" for Thanksgiving!

post signature

Wednesday, October 31, 2012

Halloween 2012


Hope you had a great Halloween! This is me with my #4 boy.  Long before blogging, I made the costume he is wearing, from a regular t-shirt, for my first baby boy. Almost all of my four boys have worn this. We had a few astronauts, a pirate, and this little pumpkin! Notice the car in his hand. Like all my boys...he just can't put it down. Loves cars!  Hope you had a great time with your family!

Thanks for reading!

post signature

Sunday, October 28, 2012

Crafting with Kids: Puffy Ghost {using shaving cream paint}

 I know Halloween is in a few days, but I'm going to attempt to finish posting the fun Halloween stuff we have done this month...in a few days. These ghosts were so much fun! We made these using paint we made mixing shaving cream and Elmer's Glue.
 PUFFY PAINT GHOST USING SHAVING CREAM:
You need:
Heavy paper (we used grocery bags)
3 parts shaving cream to one part Elmer's school glue (just regular glue)
**or measure 3/4 cup shaving cream and 1/4 cup glue - I did not measure- just looked at it and judged the amount and it worked fine.
Sponge brushes
Mix the glue and shaving cream. Apply to ghost shape. You can add eyes and mouth at that time and most of them will stick. A few will not stick and will need to be glued on later.
Allow to dry all the way. Your ghosts will be smooth and velvety soft!


This was so fun- a little messy- but it is mostly shaving cream-so it washes up very easily. When these are dry they are so so soft!  Have Fun!
post signature

Sunday, October 21, 2012

Pumpkin Pie Milkshake


Ppst! Great holiday give-a-way coming tomorrow! Come back to enter!
If you are a pumpkin fan, you will love this! I love all things flavored or baked with pumpkin. My  husband and kids said this one is a keeper. We will be making it again!

Pumpkin Pie Milkshake
recipe from Our Best Bites Cookbook

Serves 2-3
1/3 cup pumpkin puree
1/2 cup milk {or a little less}
1/4 tsp. vanilla
1/2 tsp. cinnamon
pinch of cloves
pinch of nutmeg
2 TBSP. brown sugar
2 cups vanilla ice cream
1-2 graham crackers, crushed up
we added- Whipped Cream- to put on top

Combine everything except the graham crackers in the blender. Blend until it looks right to you. Add more milk if you want it a little thinner.When done, pour into glasses, sprinkle graham cracker crumbs on top and top with whipped cream!

This makes a yummy dessert the whole family will love!

post signature


Fall 7 Layer Bars {with M&M's and caramel chips}

 
ppsst! A super surprise give-a-way is coming tomorrow... if you do any kind of holiday cards, you will want to check back for it! It will be a quick one so don't miss it!
 These are the kind of cookies you  make when you expect food to cheer you up if you are grumpy. And then you decide to eat a few of these, and fore go eating lunch. True story.

These are pretty and super simple to make, and a great party pleaser, if you need a good cookie to take to a party.

FALL 7 LAYER BARS:
1 cube butter {I use about 2/3 cube instead}
1 1/2 cups graham cracker crumbs {I chop up these in my small food chopper}
1 1/2 cups chocolate chips {I used semi-sweet}
1 cup shredded coconut
1 cup fall colored M&M's
1 cup caramel bits {the small round pieces- Kraft brand}
1 cup or less chopped up pecans {optional}
1 Can sweetened condensed milk {14 oz can- small regular size}
Preheat oven to 350 F. Melt the butter in a 9 by 13 pan in the oven. When butter is melted, take out the pan and add the graham cracker crumbs. Mix it up a little so it is evenly spread.
Next sprinkle coconut on top, followed by chocolate chips, M&M's, caramel bits, and pecans.
When done pour a 14 oz. (small size) can of sweetened condensed milk over the top.
Bake in oven for 23-28 minutes. Allow to cool completely before cutting and serving.


Be careful with  these! As always I am not responsible for any cavities, or weight gain from this recipe- except for my own.  Enjoy!
post signature

Thursday, October 18, 2012

Trick or Treat Burlap Banner

 I made this little trick-or-treat bunting a few weeks ago. After looking through magazines and pinterest, I had a vision of having a little black and white bunting for Halloween. I had the black burlap already, and the white paint. I cut out the shape I wanted, stamped the letters using the white paint, and darkened them with more paint, hot glued them to some baker's twine, and that was it! The candy corn bunting- I'm sure you have seen everywhere- was made with burlap also. I'll share that one later.
It makes a nice addition hanging above our shelves, which contain many Halloween decorations.
Easy peasy, very cheap, and  great little decoration-- that is my favorite kind!

Happy Halloween!


post signature

Monday, October 15, 2012

DIY Halloween Decor using Burlap and Wood Blocks

 Here is a little project I did this weekend. Super easy. I used things we already had-- making this project FREE! I had wood in the garage, burlap in my craft room closet, and some acrylic paint.
I had my sweet husband cut some wood for me first.
 After painting I just free handed the faces and burlap cutting. I'm sure it could look a little nicer, if I used a stencil or something..... Everything was put together with hot glue.
 Owl- is covered in brown burlap. The beak is a small piece of craft wood cut into a triangle.
Ghost- easy- just painted black circles on the white painted block of wood.
Witch-black burlap hair and hat. The hat is stuffed w/ black burlap and glued together. The nose is a piece of wood from a tree. Ric-rac added for more color.
 Frank- hair was painted black, then covered with black burlap pieces.
Mummy-painted white, then covered with burlap- that I painted white- but you can buy burlap in white too.
Jack- the stem is from a tree, and ribbon and ric-rac added to stem.

My kids love these! So I guess it was a success! I like having a fun decoration- we made and that cost  almost nothing.
Happy  Fall!

post signature


Friday, September 28, 2012

Nine Halloween Crafts & Activities for Kids

Here are a few of the fun Halloween Crafts from the Archives of My Little Gems. Most of these cost less than a dollar, and the kids will have a ton of fun!
 1. Frankenstein Feet
2. Pipecleaner Pumpkins
3. 5 Little Ghosts Story
4. Glow-in-the-dark Spiders
5. Cardboard Tube Creatures
6. Silly Little Bats
7. Pipecleaner Skeletons & Stories
8. Lego-Jack Game
9. Halloween I-Spy Search-n-Find Tub


post signature

Friday, September 21, 2012

Weekends...

We don't get much of a real weekend around here, due to work schedules and things like that. But somehow we have been managing a little time to get something done or have some fun. I am so excited for Fall Weekends-- mostly because it might finally start to cool off enough to get some big projects done outside- and when I say cool off - I mean maybe just maybe it will drop into the low 90's.....that is fall in Arizona.
 Here is a peek in photos.
More posts to come next week I hope! I have some fun products to share with you, and a few Halloween ideas! Hope I get time to get them all posted....


So if my posts are far and few between, it is because we are enjoying some autumn! Happy Fall!

post signature

Sunday, July 29, 2012

Pumpkin Bread in the Crockpot {Slow-Cooker}

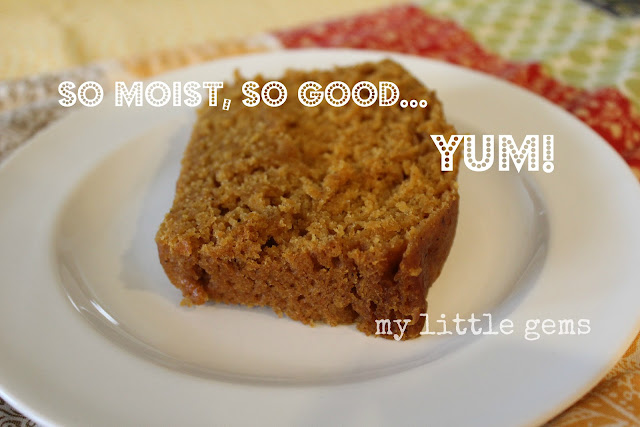
 Pumpkin Bread in the Crockpot...it totally works! I love pumpkin everything- so when I saw this, I had to try it right away. It was really good! It is very moist bread. The recipe is easy and delicious. If you are waiting until Fall for pumpkin baking- pin this- because it will be Fall before we know it!{ I love pumpkin everything- not just in the Fall but all year.}

Crockpot Pumpkin Bread


  • 1/2 cup of oil (I used 1/4 applesauce, and 1/4 canola oil)
  • 1/2 cup of sugar
  • 1/2 cup of packed brown sugar
  • 2 eggs (beaten)
  • 1 can of pumpkin (15 oz can pure pumpkin)
  • 1 1/2 cup of flour (sifted)
  • 1/4 tsp. of salt
  • 1/2 tsp. of cinnamon
  • 1/2 tsp. of nutmeg
  • 1 tsp. of baking soda

  • First, mix the oil and sugars (and applesauce if you use that instead of part of the oil). Add the beaten eggs, and pumpkin. Mix well. Add the dry ingredients and mix well. Spray a regular sized bread pan with baking spray. (I use PAM baking spray.) Pour batter into pan. Now put 2 cups of water in your crockpot/slow cooker. Now carefully place the bread pan into the crockpot. Before placing the lid on, take 8-10 paper towels, and lay them across the top so that they are trapped between the lid and the crockpot. This will help prevent the bread from becoming mushy. Try to trap the paper towels with the lid, so they do not fall into the crockpot. Turn your crockpot on high and cook for 2 1/2-3 hours. Your house will smell wonderful! When finished, the bread will be very soft and moist. Carefully remove from pan, allow to cool and enjoy!

    I think I would definitely use this paper towel method with my other crockpot recipes- like the apple pie in a crockpot, and the caramel apple pie.

    This bread is really good! I would make it again! I do really like my regular recipe - I bake in the oven- it allows for a crispy crust. You will not have a crispy crust with this- but it is still very delicious!

    Enjoy!

    post signature

    Tuesday, December 6, 2011

    Apple Caramel Pie in the Slow Cooker/Crockpot

    After making my Apple Pie in the Crockpot, I found this recipe on the Fix-It and Forget-about-It site. And it was really  really good. And now I know I can make almost any flavor pie in a crock pot. yay.

    I t was simple and yummy, but obviously, don't make it if you don't have self control when it comes to dessert. It is too good to resist! And I'm glad my husband ate most of it.

    You really only need 3 ingredients:
    Pie Crust (2- top and bottom pieces), Apple Pie Filling (about 3 cups- we used some we had made in the Crock Pot) and about 12 Kraft Caramels.
    I learned a few things when making this: DON'T spray your crock pot with non-stick spray. It will slide down the sides. Don't overlap your pie crusts too much when placing them in the crock pot.
    Cook the crust on HIGH for 1 1/2 hours first.
    Then add the apple pie filling, mixed with the caramels-which I cut up, and cook for 1 1/2 hours on LOW. Every crock pot or slow cooker is different, so keep an eye on it.
    The entire recipe can be found HERE- and there are lots of good questions that are answered there too!
    Thanks for reading!
    post signature

    Wednesday, November 23, 2011

    Happy Thanksgiving!


    Happy Thanksgiving! Tonight we made our traditional handprint/footprint t-shirts. Here are few of the other crafts that have gone on at our house this month.


    I had the preschoolers put on this cute turkey hat, and I sent a copy of the photo to their parents. My child, however, wanted to hold it like he was a "hunter" and be a piligrim guy like he saw in a book. That's my boy!!


    Happy Thanksgiving to everyone! We have so much to be grateful for!!
    post signature

    Wednesday, November 16, 2011

    Crafting with Kids: Turkey Craft using Textures, & Cardboard Tubes

    Is Thanksgiving really next week? I have almost skipped it this year. Not that I am not THANKFUL...I have skipped it in "blog land" trying to enjoy my children who are growing up so quickly!
    This was a little turkey craft we did in preschool and I thought I would share it with you. Whenever I can, I try to combine at least two things in preschool. So we talked about textures and make a little turkey using different textures. The front is sandpaper, with felt pieces and googly eyes. We attached that do a cardboard tube (1/2 of a TP roll). For the feathers, we used coffee filters. Instead of markers, we colored them with crayons, since we had made the turkey with coffee filter craft before. That was it. I attached everything usinga  stapler or glue.  This was a cute craft because it can stand up all by itself! The kids enjoyed it!
    Happy Thanksgiving!

    post signature